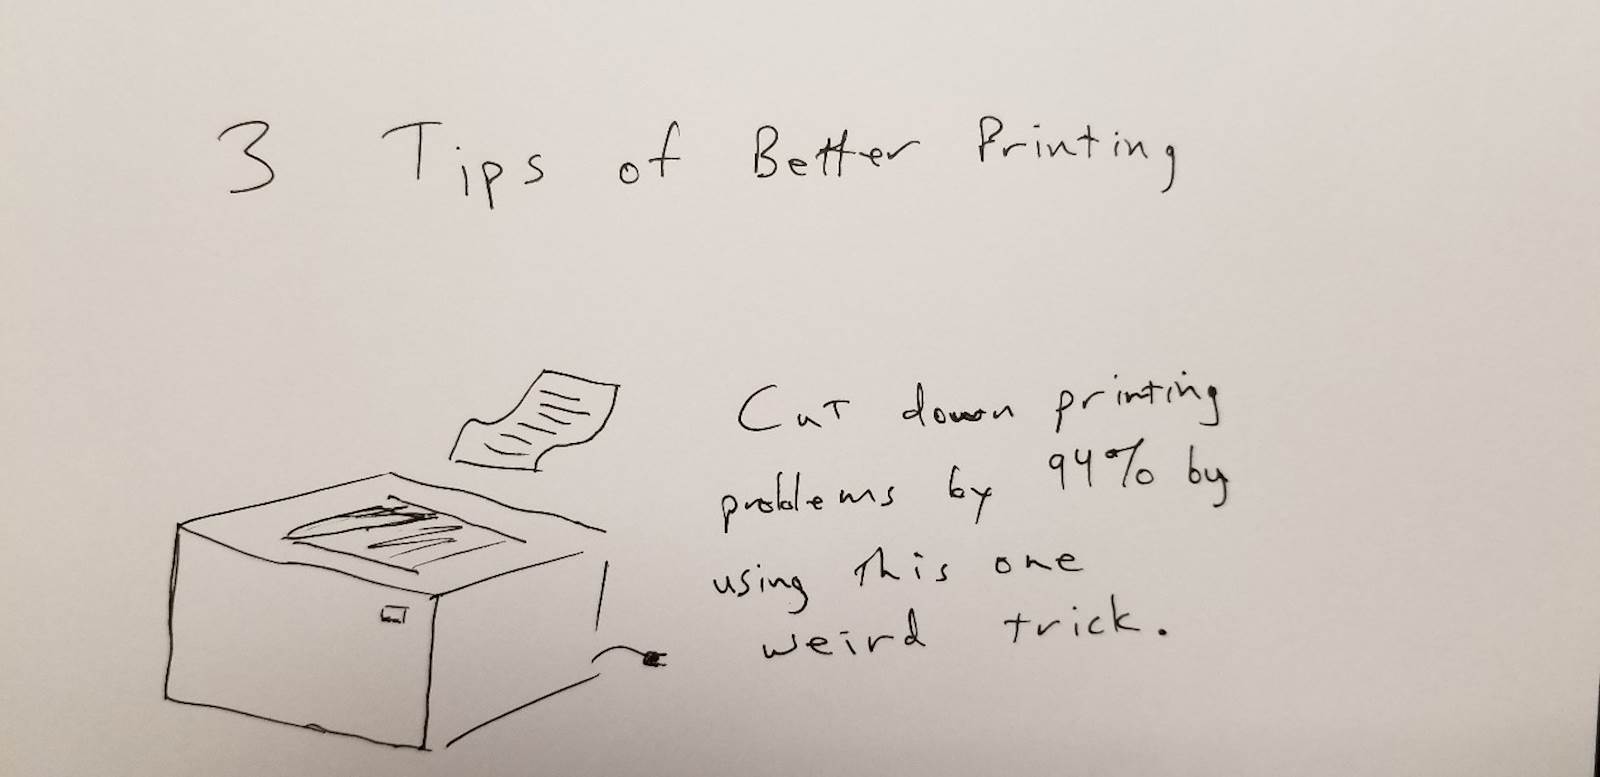
We’ve all seen those pop-up ads on the Internet, promising quick relief from a wide variety of problems. About 99.9 percent of the time, it’s a mistake to even hover your cursor over them. Luckily, this time you clicked.
The LRS support team deals with customers of all sizes, from every continent and every industry. Accordingly, our software is designed to be highly flexible and customizable to adapt to various situations. But there are some general best practices for configuring our VPSX family of products that can benefit nearly any customer.
With that, I would like to offer a few tips to consider when configuring VPSX printers:
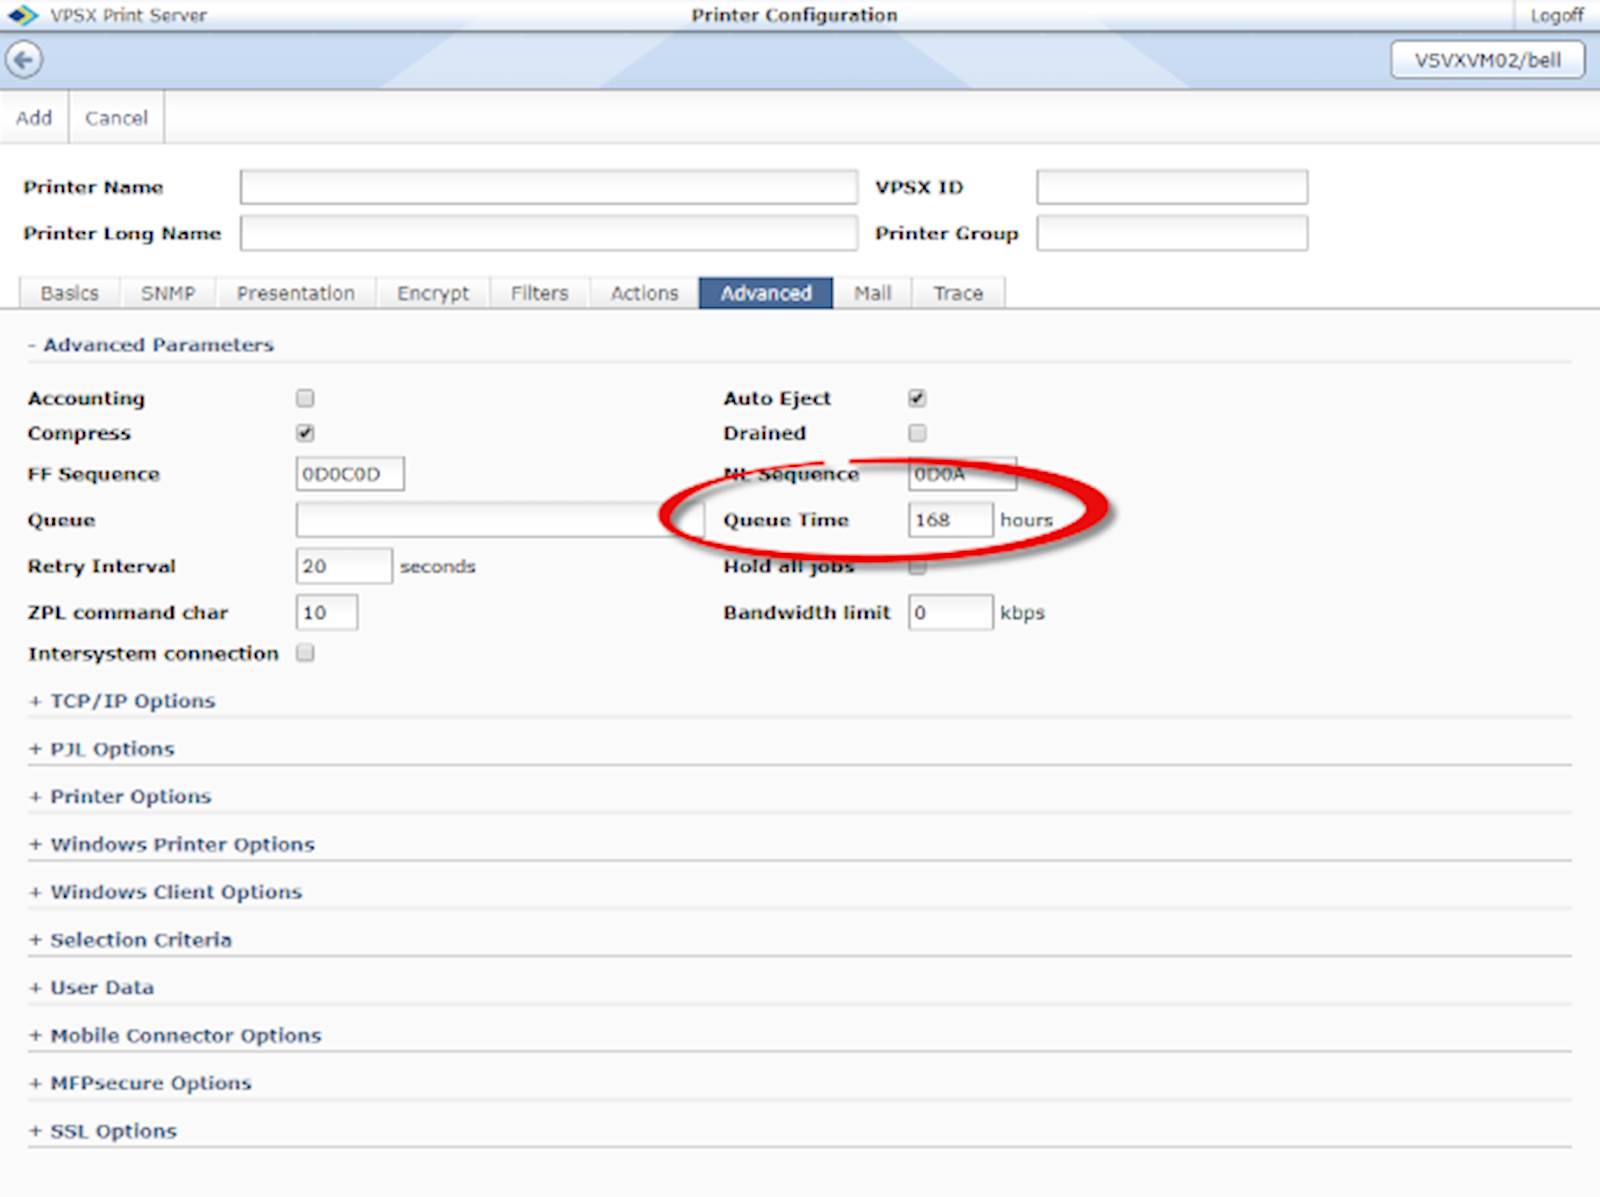
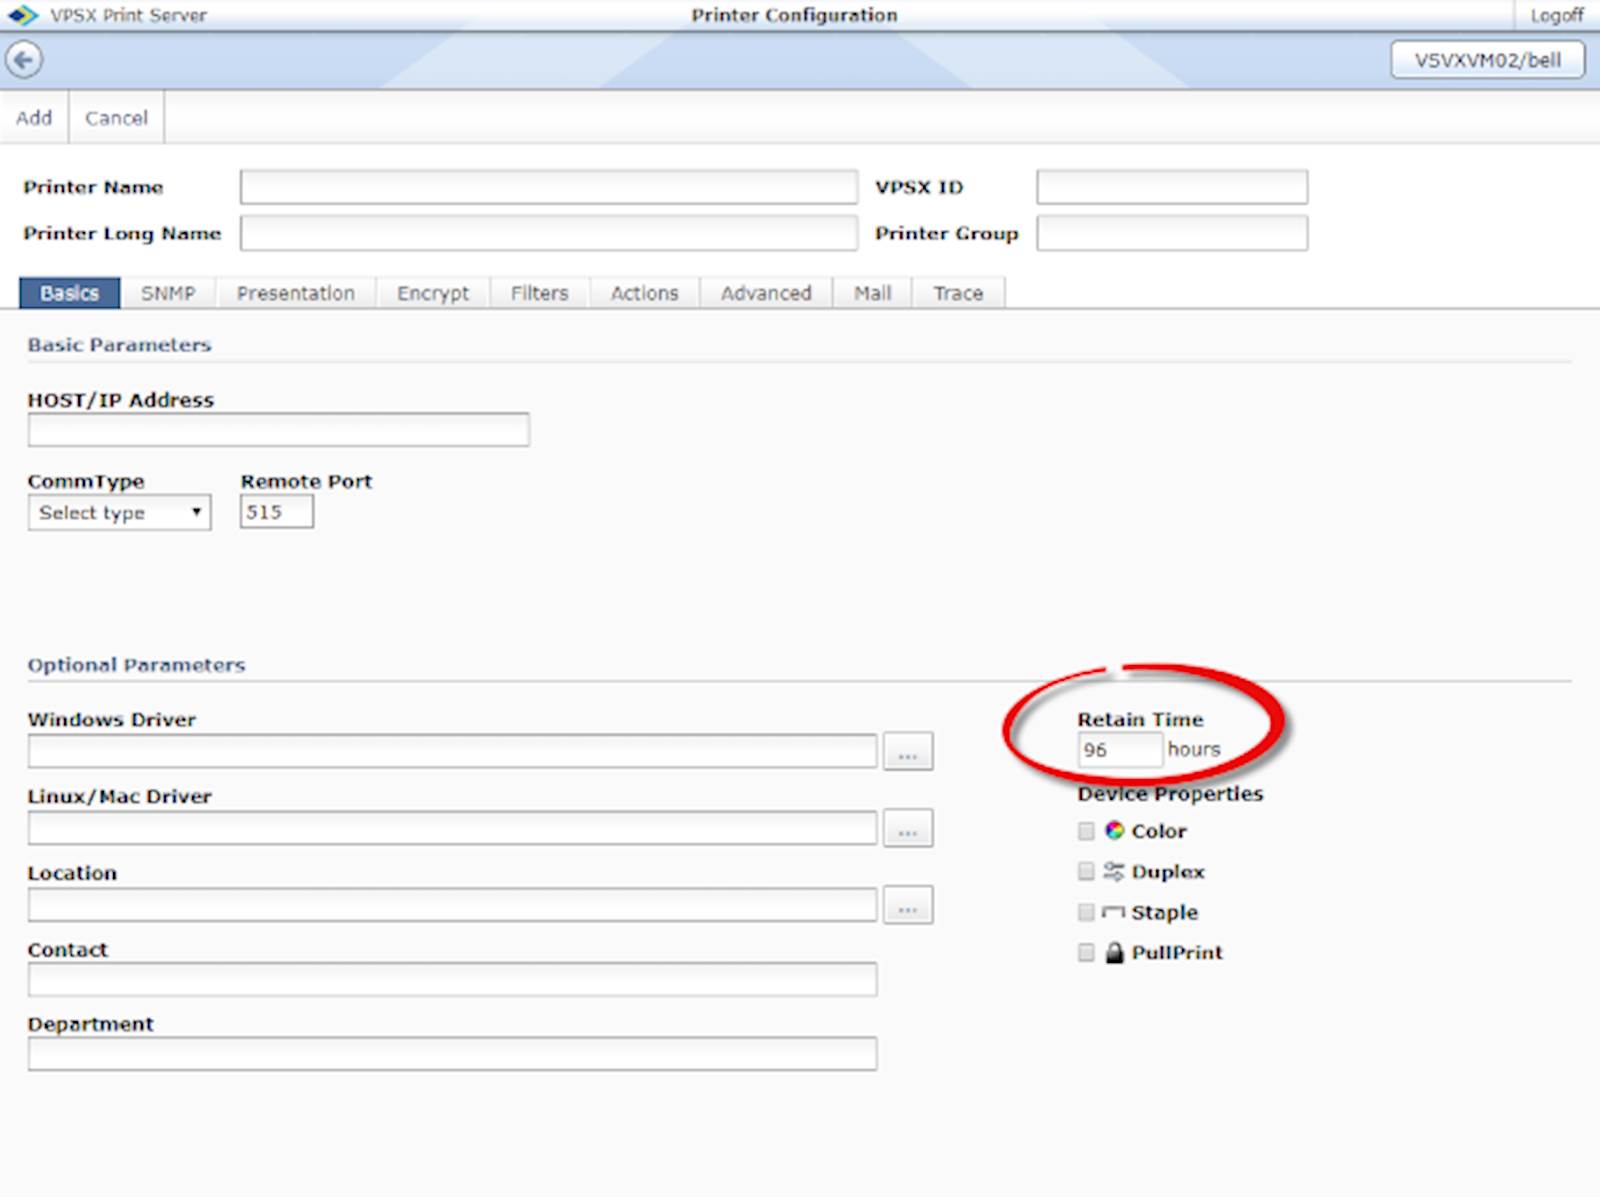
Tip #1: Be sure to set both a RETAIN and a QTIME value for all defined printers. Most customers remember to specify a RETAIN time, which tells the system how long to keep the document after it has successfully printed. That way, if users want to print a duplicate copy of a document, they do not have to go back into the original application and generate it from scratch. Retaining the original document can also be helpful if we need to troubleshoot an issue with that document.
Strangely, many customers leave the QTIME field blank. This keyword controls the maximum time (in hours) a print file will remain in a queue without printing. The feature is intended to stop obsolete queues or queues (where the printer is no longer available) from gradually filling up with spool files that will never print. By default, output will remain in a queue until it is printed or explicitly purged (to prevent inadvertent data loss). Setting a reasonable value for QTIME can save system resources, storage space, and also reduce VPSX initialization time. To set the Queue Time value, click on the “Advanced” tab of the Printer Configuration screen as shown below. The RETAIN value is found on the “Basics” tab.
Okay, I can almost hear you saying “Sure John… now you tell me. Do I have to go back through each individual printer definition and add values for QTIME and RETAIN?” Luckily, there is an easier way. We have tools such as our Printer Definition and Deployment Tool (PDDT) that automate much of this work.
Tip #2: When defining printers, I usually recommend administrators to check the ‘Don’t bind outbound connections to TCPHOST’ checkbox. This tells the LRS software not to bind to any specific NIC (network interface controller). By checking this box, you will let the operating system determine the best NIC to use when sending the data to the required destination. This is the best approach in most environments, but some organizations require explicit NIC binding because of strict firewall rules. If this is the case in your organization, you may want to call LRS to discuss alternatives to balance network security, performance, and flexibility. If you are seeing “TCP/IP BIND REQUEST FAILED” error messages in your VPSX log, checking that box will make outbound connections more efficient and prevent those errors from occurring.
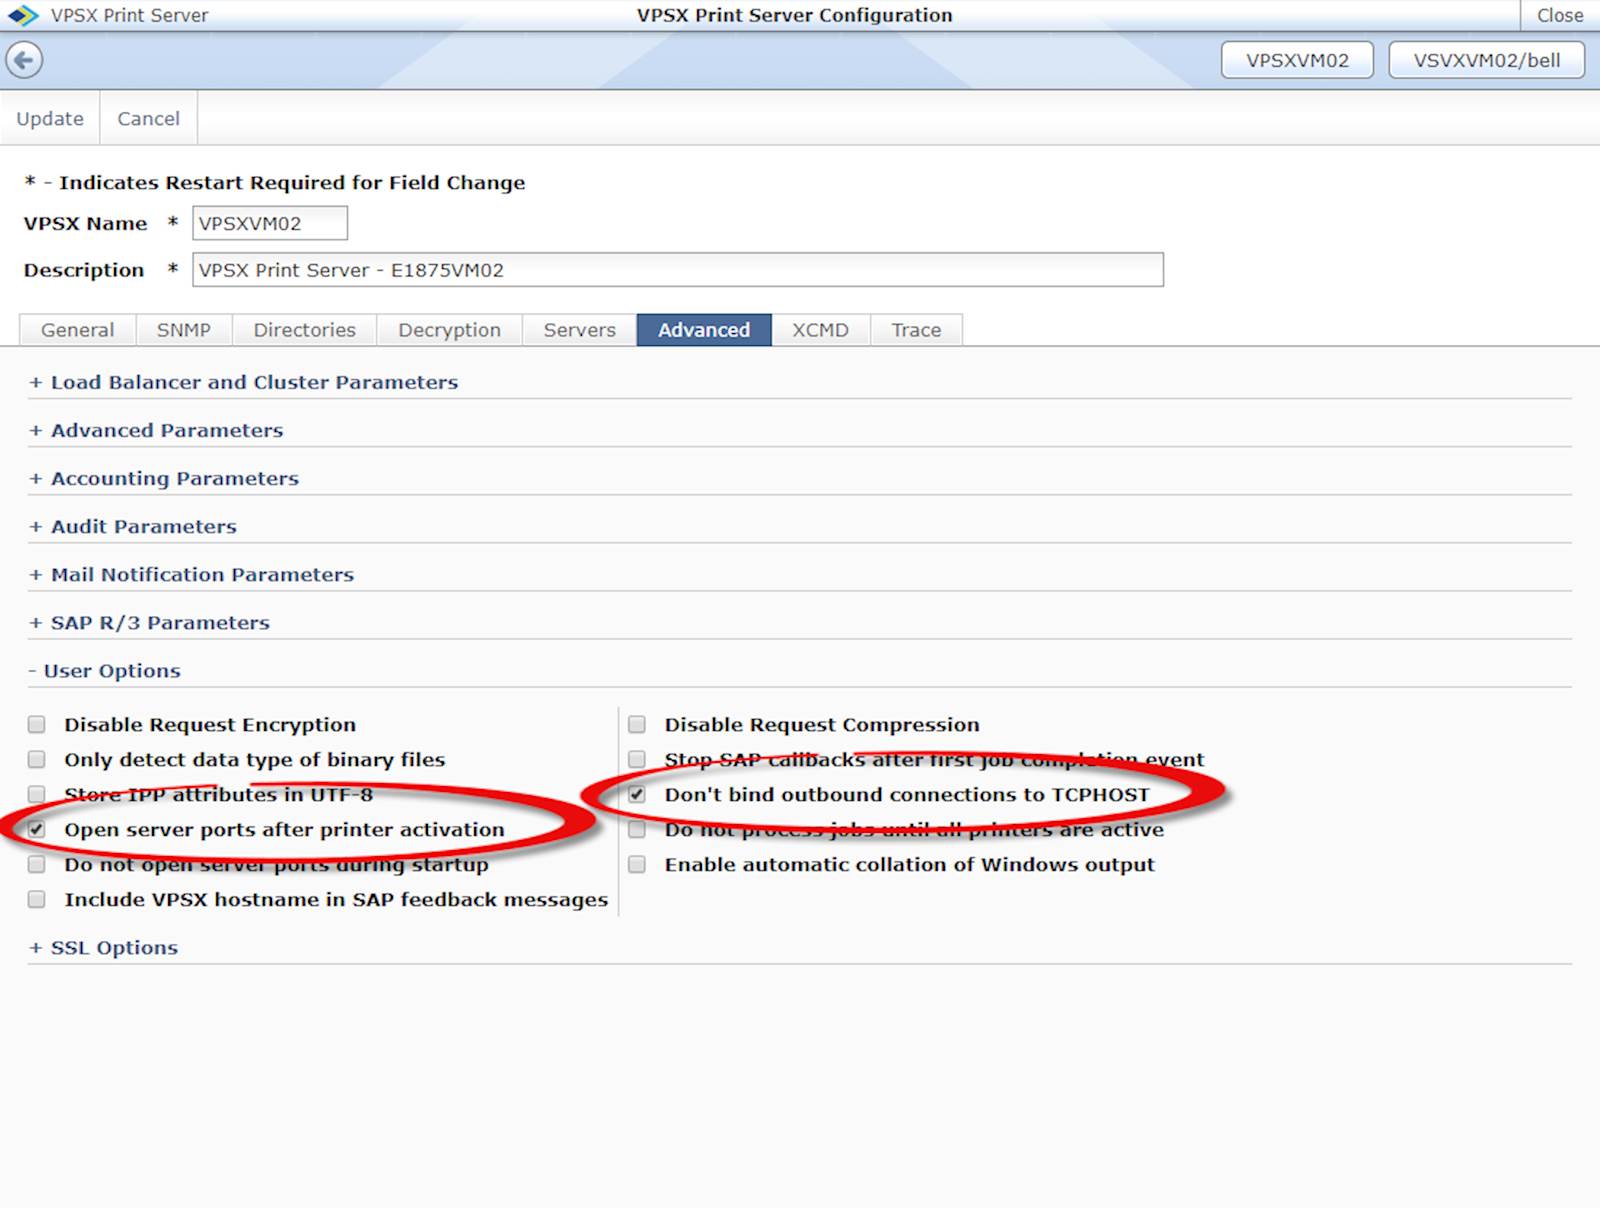
Tip #3: Select the ‘Open server ports after printer activation' option. This tells the LRS software not to open the ports and accept jobs until all printers have been activated. Doing so will ensure that all printers are ready to receive output before any application can connect to VPSX.
When the VPSX software is started, it will open the inbound ports and begin activating the printers alphabetically. Depending on the number of jobs in the queue (see Tip #1), it may take a minute or more to activate all the printers. During activation, if you send a job to a printer named "A_PRTR" it will probably be activated and you will be able to receive the job. However, if you send a job to a printer named "Z_PRTR," the printer may not yet be activated and you will receive a "Printer Not Defined" error. Checking the ‘Open server ports after printer activation' box tells VPSX to first activate all the printers and only open the inbound ports after printer activation is complete. This will also reduce VPSX initialization time because VPSX (and its server resources) can focus on activating the printers.
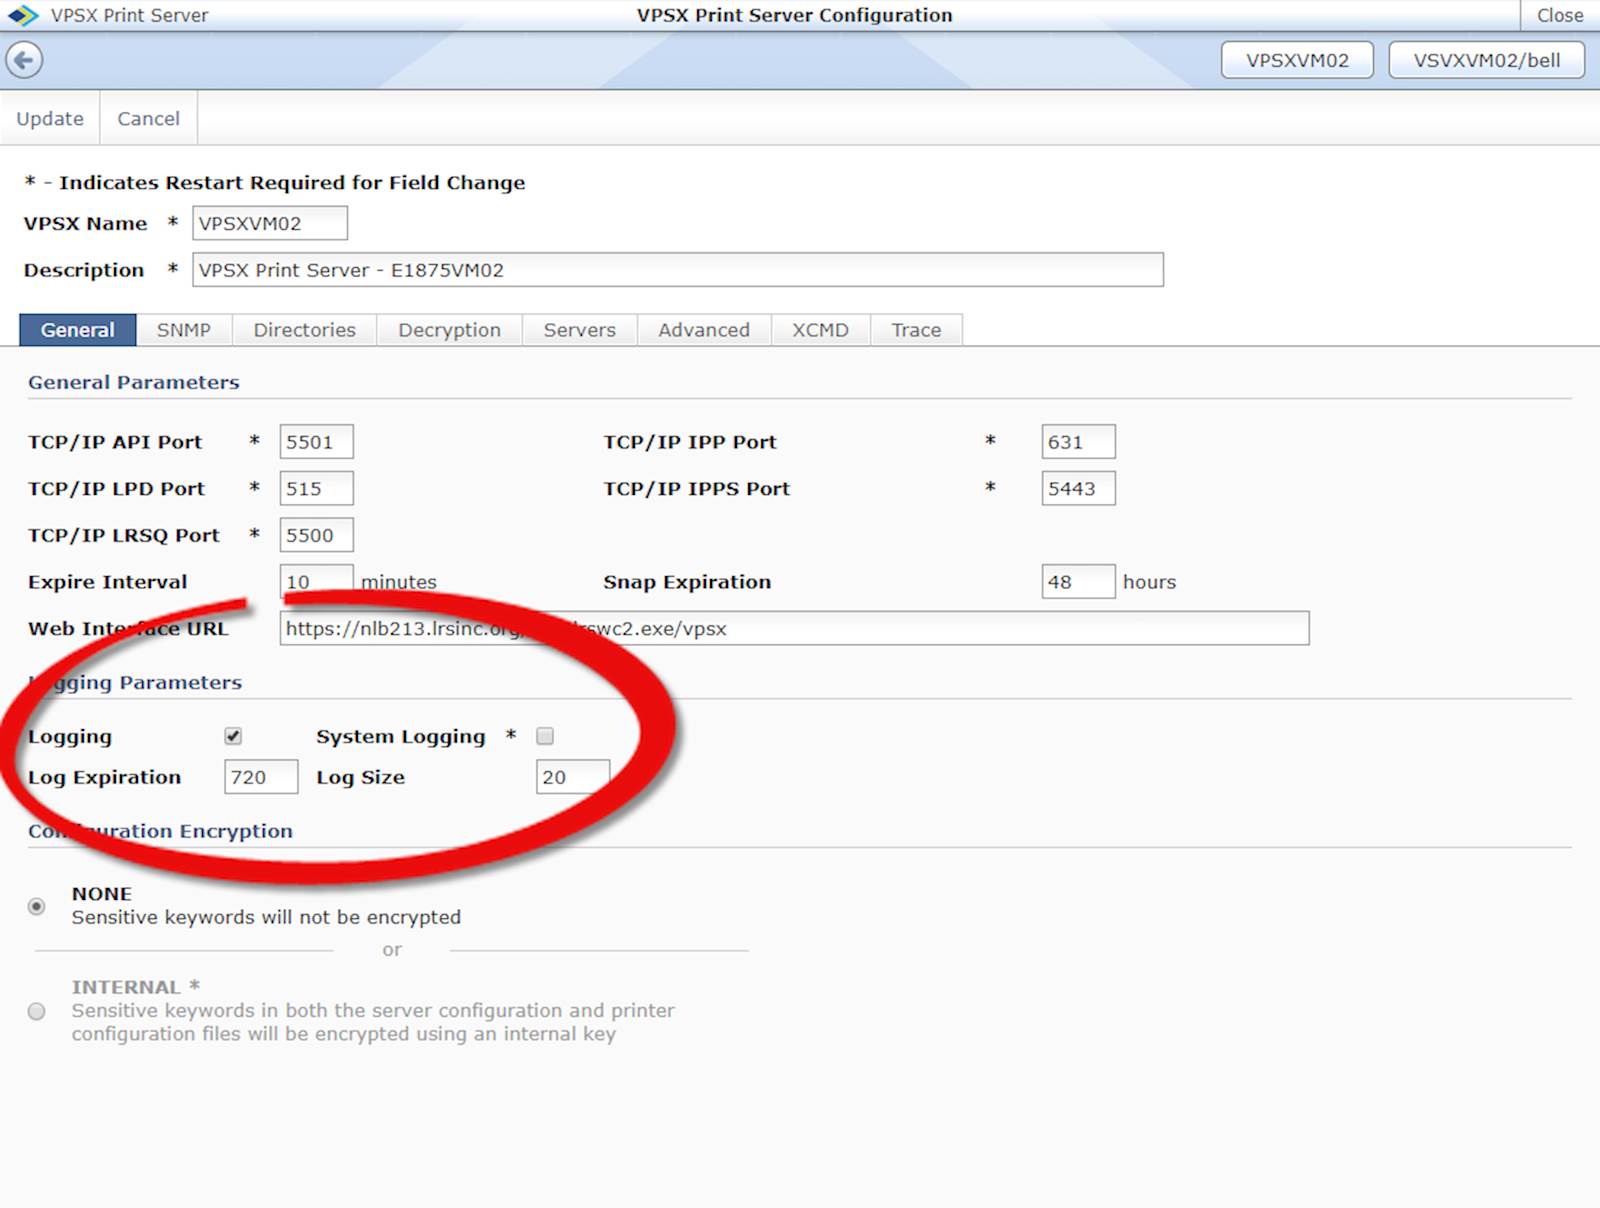
One weird old trick: Okay, I know this is what made you click on this Blog link in the first place, so here goes: set the logging parameters in your VPSX system to give you plenty of information in case you need to contact LRS support. The first thing you will want to set is the Log Expiration. That will determine how many hours the logs are retained before being deleted. I would recommend at least one weeks' worth of logs, but if you have the disk space to spare, keeping them longer can be useful. The more log files we have, the more information will be available to help me… er, your LRS support team… pinpoint any printing issue.
The next thing you will want to set is the Log Size. If you have ever tried to follow a print job all the way through VPSX, you may have noticed your log is archived every few hours (or even minutes on busy systems). If your job spans multiple logs, it can make it difficult to see all the messages on one screen. To help make that process easier, you can increase the Log Size. My rule of thumb is to calculate the total size of the logs for a single day and then pad it out a little bit. That way on average you have about one log per day. Though for the sake of manageability, I would suggest keeping the file size at 50MB or less. Disk space is relatively inexpensive these days, so having plenty of logging data is cheap insurance.
Yes, this last point is clearly in my own self-interest and that of my colleagues in LRS Support. But it also helps you, since having ample information in your VPSX logs helps us more quickly spot patterns in the data so we can find what’s causing the issue that prompted you call LRS.
I have accumulated a lot more best practices, which I will share in a future article. In the meantime, if you have any questions about how to get the most from your LRS software, contact one of our printing experts and we’ll do our best to help.